
Inspect arrows before each shot: check the shaft, nock, point and fletching for damage or loose parts. For carbon arrows, use the flex test specified by the shaft maker. If you find damage or are unsure the arrow is safe, take it out of use and do not shoot it. Easton’s arrow inspection instructions give one manufacturer example.
Key Takeaways
- Inspect the full shaft, nock, point and fletching before every shot.
- For carbon arrows, follow the shaft maker’s flex-test method.
- Never shoot an arrow with visible damage or a cracking sound.
Why inspect arrows before every shot?
Easton says to inspect each arrow shaft, nock and other components before every shot, including a new arrow. Impacts with hard objects or other arrows can cause damage. A damaged shaft may fail at release, so take questionable arrows off the shooting line instead of testing them by firing.
How do you inspect an arrow before shooting?
Use good light and check the entire arrow from end to end. Rotate the shaft to view all sides, then inspect the nock, point or insert, and fletching. For a carbon shaft, use the manufacturer’s recommended additional test after the visual check; it does not replace checking the components.
- Look along the shaft. Rotate it slowly under good light. Check for nicks, cracks, splits, dents, or splinters. If the shaft appears intact, feel it lightly for roughness; do not rub over visible splinters.
- Check the nock and nock end. Look for chips or cracks and confirm the nock is fully seated. If it is loose or has backed out, inspect the shaft around it and keep the arrow out of use until the cause is resolved.
- Check the point, insert and fletching. Stop if a point or insert moves, or if a vane or feather is loose enough to affect clearance. Repair components only with compatible parts and the maker’s directions.
- Consider the arrow’s last impact. A hard strike or arrow-on-arrow hit can cause damage that is easy to miss. Follow the manufacturer’s inspection method; if you cannot confidently inspect it, ask a coach or retire it.
How does a carbon-arrow flex test work?
A flex test can reveal carbon damage that is hard to see, but the bend and handling instructions depend on the shaft maker. Easton’s method uses a 1–2 inch (2.5–5 cm) deflection, repeated four to six times while rotating the shaft, with the bend pointed away from people.
That measurement is Easton’s instruction, not a universal standard. Follow the manual for your exact arrow, wear eye protection when performing a test, and stop if you hear or feel cracking. Easton says to discard a shaft that shows damage; read the full manufacturer warning before using its method.
What should you do if an arrow is damaged?
If a shaft is cracked, split, splintered, dented or makes a cracking sound during the maker’s check, stop using it. Set it aside so it cannot return to the quiver. Do not glue or tape a structural defect; follow the manufacturer’s instructions for disposal or evaluation.
Check the rest of the group too if arrows struck one another or a hard surface. If you are uncertain whether a mark is cosmetic or structural, ask your coach, bow technician or arrow manufacturer before shooting that shaft again.
Does inspection differ in traditional and Indian archery?
The same pre-shot rule applies in traditional and Indian archery, but shafts may be wood, bamboo or cane and may use self-nocks or handmade fittings. Look for splits, splinters and loose parts, and ask a bowyer or coach when unsure. Do not apply a carbon-specific flex test without instructions.
| Arrow material | Inspection focus | Stop using it if |
|---|---|---|
| Carbon | Look for cracks, splits, dents and splinters; check components and use the maker’s flex test. | You see damage or hear or feel cracking during the maker’s check. |
| Wood, bamboo or cane | Look for splits, splintering and damage around the nock or point; ask a bowyer or coach if unsure. | You find a split, splinter or loose critical component. |
The material changes what damage may look like, not the need to inspect. Archery UK, published by Archery GB, notes that damaged carbon and wooden arrows can splinter or snap. For traditional equipment, have a coach or bowyer check unfamiliar repairs and shaft fit.
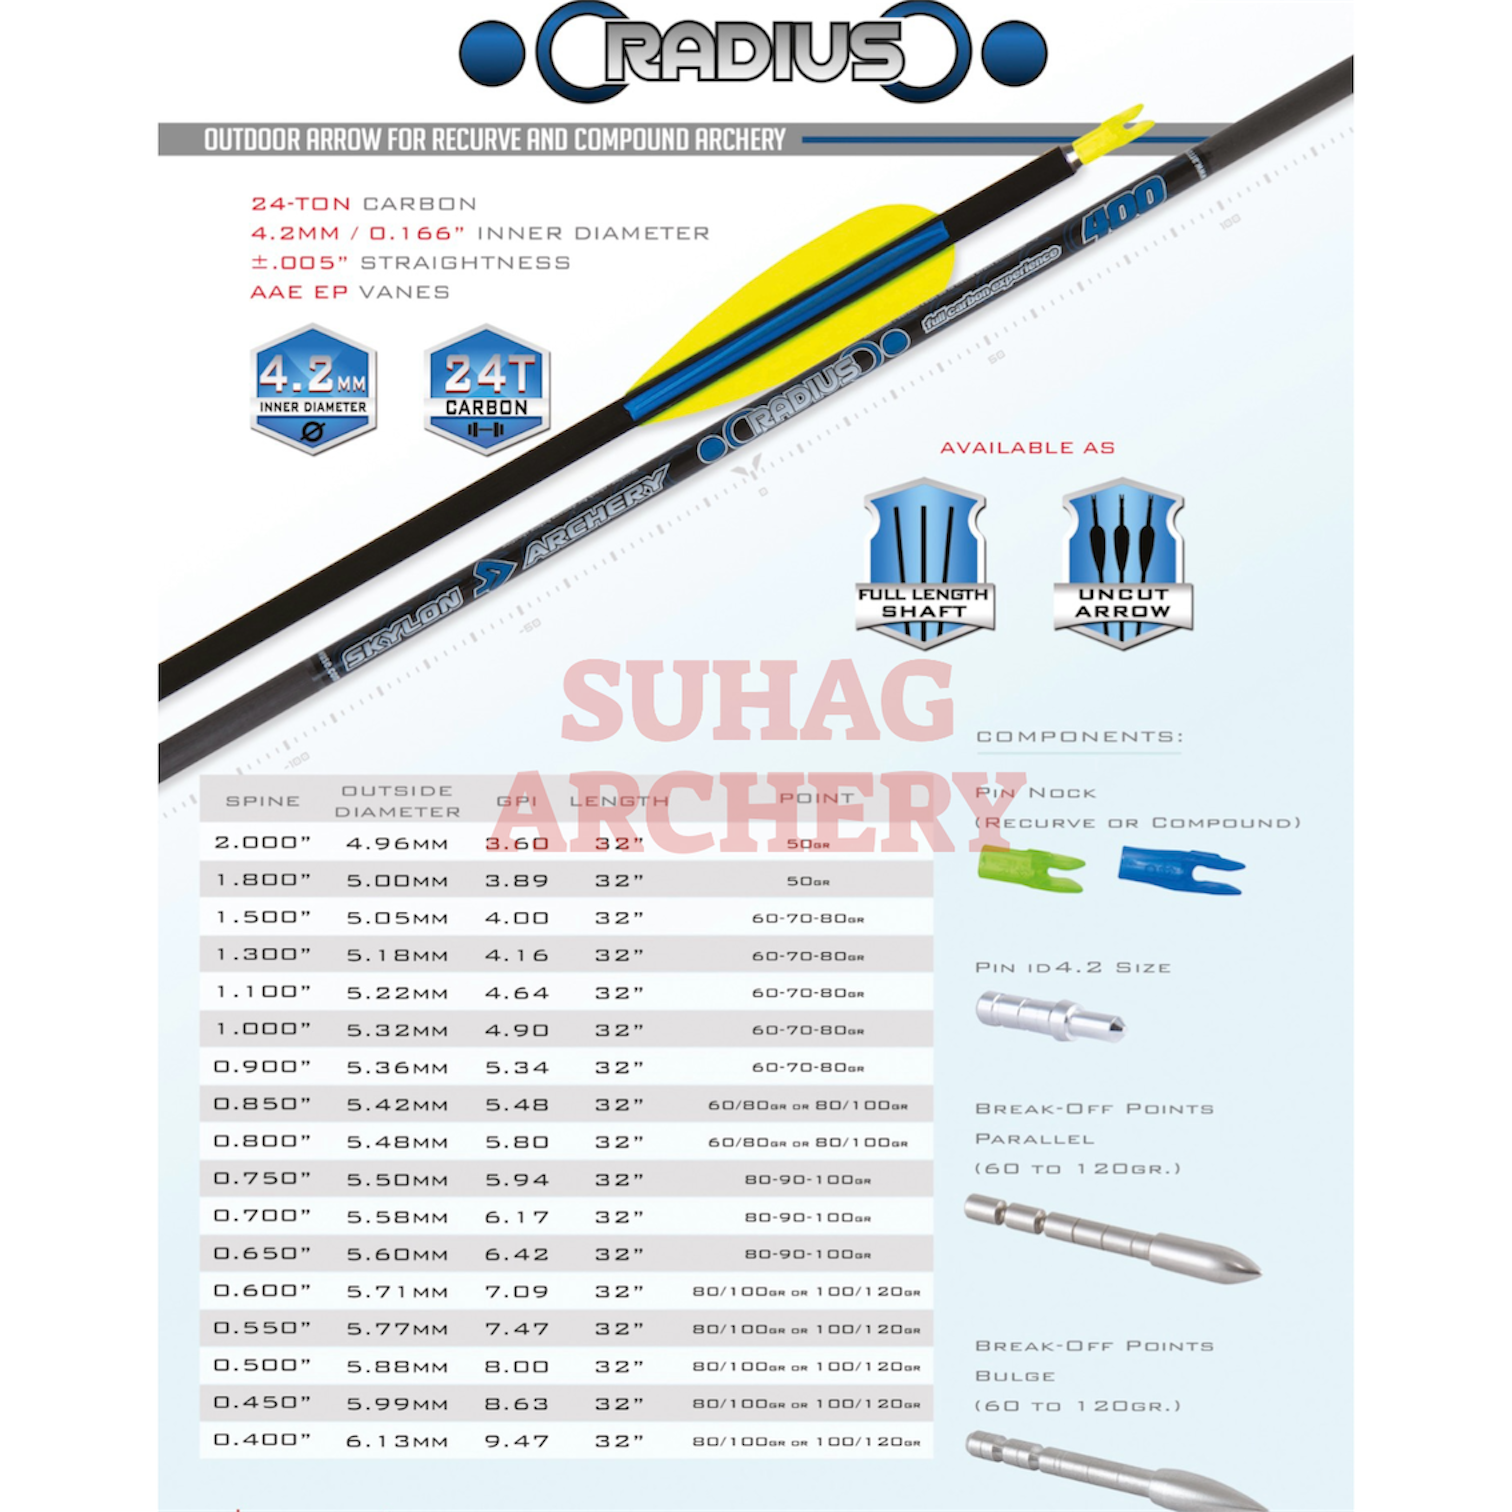
When replacing an arrow, match the new shaft to your bow setup. Read our guides to arrow spine and arrow length; our fletching guide explains how to assess vanes and feathers. You can also compare the arrows and arrow accessories available at Suhag Archery. One example is the Skylon Radius carbon arrows with points; choose a spine and length for your bow, not by product name alone.
Frequently asked questions
These answers cover how often to inspect arrows, what the carbon flex test checks, and what to do when you find damage. The safe rule is to inspect every arrow and component, use only the shaft maker’s test, and keep any arrow with suspected structural damage out of use.
How often should I inspect my arrows?
Inspect each arrow and its components before every shot, including new arrows. Check again after an impact with another arrow, a hard surface, or other unusual contact.
How can I tell if a carbon arrow is cracked?
Look and feel for cracks, splits, dents, or splinters. Follow the shaft maker’s flex-test instructions if provided. Any damage or cracking sound means do not shoot the arrow.
Should I flex-test every carbon arrow?
Use the method specified by the shaft maker. Easton gives a flex test for its carbon arrows, but its bend amount and rotation instructions should not be treated as a universal rule for every brand.
Can a damaged carbon arrow be repaired?
Keep a damaged carbon shaft out of use and follow the maker’s instructions for disposal or evaluation. Do not glue or tape a structural crack and shoot the arrow.
Are wood or bamboo arrows checked the same way?
No. Check for splits or splinters and inspect the nock, point, and fletching, but follow the bowyer’s or arrow maker’s guidance. Do not automatically apply a carbon-arrow flex test to wood or bamboo shafts.